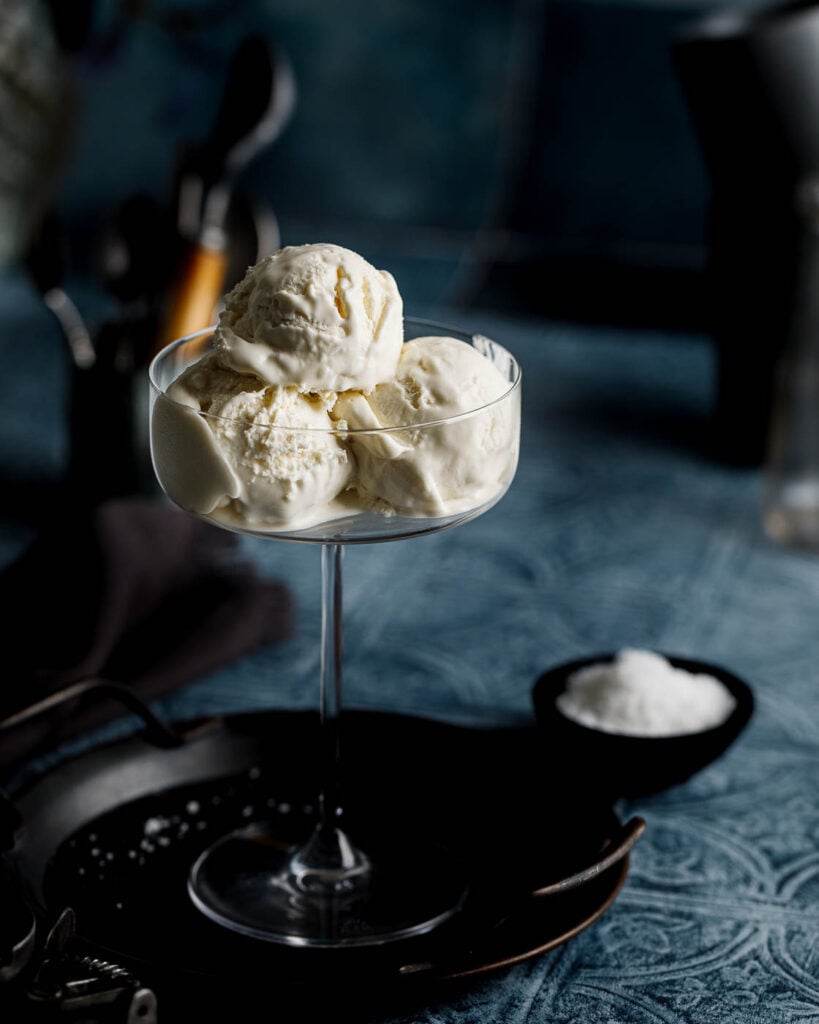
No Churn Chocolate Marshmallow Ice Cream Recipe
This creamy and delicious Chocolate Marshmallow Ice Cream recipe is made with a milk chocolate ice cream base and a marshmallow swirl.

Marshmallow and chocolate make a perfect combination and the best part? It’s a no churn Ice cream, which makes it a super easy recipe prepared in little time, -plus it has no egg yolks in it!
Why is this Chocolate Marshmallow ice cream a No Churn recipe?
No-churn ice cream refers to any ice cream recipe that doesn’t require an ice cream machine. This makes it a quick and simple dessert to prepare at home.
To achieve the soft, creamy texture of this no-churn ice cream, you’ll need two key ingredients: whipped cream and sweetened condensed milk.

Ingredients needed to make this homemade Ice cream
You’ll need simple, basic ingredients, easily found at most grocery stores:
- Heavy whipping cream: Creates a rich, creamy texture.
- Sweetened condensed milk: Adds sweetness and helps with the smooth texture.
- Vanilla extract: Use high-quality, pure vanilla extract for the best flavor.
- Salt: Enhances the flavors.
- Unsweetened Cocoa powder: Provides the chocolate flavor for the base.
- Marshmallow fluff: Can be swapped with marshmallow cream, if needed.
Check out the recipe card at the bottom of this post for the complete recipe details.
Add-Ons and Substitutions for this homemade ice cream recipe
Add-Ons:
- Chocolate Chips or chopped chocolate: Fold in mini or regular chocolate chips for extra texture and a boost of chocolate flavor.
- Crushed Cookies: Add crushed chocolate sandwich cookies, graham crackers, or wafer cookies for a crunchy mix-in.
- Chopped Nuts: Stir in chopped almonds, pecans, or hazelnuts for a nutty twist, or a rocky road ice cream flavor.
- Caramel or Fudge Swirl: Drizzle caramel or fudge sauce between the layers to create additional swirls.
- Sprinkles: For a fun, festive look, mix in colorful sprinkles.
- Marshmallows: Toss in mini marshmallows for even more marshmallow goodness.
- Peanut Butter Swirl: Add dollops of peanut butter and swirl it into the layers for a creamy, nutty flavor.
Substitutions:
- Salt: Swap table salt with flaky sea salt for a subtle, gourmet touch.
- Sweet Marshmallow Fluff: Substitute with marshmallow creme, or melt regular marshmallows with a little butter.
- Sweetened Condensed Milk: Use condensed coconut milk as a dairy-free alternative.
- Heavy Whipping Cream: Replace with coconut cream for a non-dairy version. Make sure to chill the can of coconut cream overnight and scoop out only the solid part.
- Vanilla Extract: Use an equal amount of almond extract or hazelnut extract for a unique flavor twist.

How to make this Chocolate Marshmallow Ice Cream
This recipe is made with a few simple steps:
To make this ice cream, start by whipping the heavy cream in a large mixing bowl until stiff peaks form. This step is key to creating the creamy texture of no-churn ice cream.


Once the cream is whipped, gently fold in the sweetened condensed milk, vanilla extract, salt, and sifted cocoa powder. Mix everything until fully combined, ensuring no lumps remain.
If the marshmallow fluff feels too sticky or stiff, warm it in the microwave on low heat for a few seconds to soften it. This makes it easier to swirl later.
Pour half of the chocolate mixture into a freezer-safe container, loaf pan, or airtight container. Add half of the softened marshmallow fluff in dollops throughout the layer, then use a knife to swirl it gently.
Cover the first layer with the remaining chocolate mixture, ensuring it fully covers the bottom layer. Repeat the process with the remaining marshmallow fluff, swirling it into the top layer.
Once everything is layered and swirled, cover the container tightly and freeze for at least 8 hours or overnight. When ready to serve, scoop and enjoy as is, or add a drizzle of chocolate syrup or melted chocolate on top of the ice cream for an extra indulgent touch!
Tips and Tricks
- Check your ingredients: Make sure you have everything ready before starting. Running out of ingredients mid-recipe can be frustrating!
- Boost the chocolate flavor: For a richer chocolate taste, use Dutch-processed cocoa powder instead of regular cocoa powder.
- Avoid lumps: Cocoa powder can be lumpy, so sifting it ensures a smoother ice cream mixture.
- Prevent freezer burn: Air exposure can cause freezer burn. Cover your container tightly with a lid, or use plastic wrap or aluminum foil if you’re using a loaf pan.
- Customize the texture: For softer ice cream, whip the heavy cream to soft peaks. For firmer ice cream, whip it to stiff peaks.
- Soften the marshmallow fluff: If the marshmallow fluff is too stiff, microwave it for a few seconds on low heat to make swirling easier.

Frequently Asked Questions
How long does Ice Cream last
Homemade ice cream can last in the freezer for around 2 weeks if stored correctly. After that, ice crystals may form, and the texture and flavor could change.
Can I use regular marshmallows instead of marshmallow fluff?
Can I use regular marshmallows instead of marshmallow fluff?
Yes, but you’ll need to melt the marshmallows first. Heat them with a small amount of butter over low heat until smooth, then let them cool slightly before swirling into the ice cream.
How do I prevent ice crystals from forming?
Ensure the container is tightly sealed with a lid or wrapped well in plastic wrap or foil to prevent air from getting in. Minimizing air exposure helps avoid ice crystals.
Can I make this recipe dairy-free?
Yes, you can substitute heavy cream with coconut cream and use sweetened condensed coconut milk. Just note that the flavor may differ slightly.
How long does it take to freeze?
The ice cream needs at least 8 hours in the freezer but overnight is best for a firm, scoopable texture.
What container is best for storing homemade ice cream?
An airtight container designed for freezing is ideal. If using a loaf pan, be sure to cover it tightly with plastic wrap or foil.
Here’s a video of this Chocolate Marshmallow ice cream recipe so you can see up-close the consistency of this luscious ice cream!
Take a look at the photos and links below for more No-Churn Ice Cream Recipes, or follow this link for some Frozen dessert recipes.


If you make this recipe, please be sure to give it a rating and leave a comment!

Chocolate Marshmallow Ice Cream Recipe
Equipment
- 1 Electric mixer
Ingredients
- 2 Cups heavy whipping cream chilled
- 14 ounces (1 can) sweetened condensed milk
- 2 teaspoons vanilla extract
- 1/2 teaspoon salt
- 1/3 Cup Cocoa powder + 1 Tablespoon sifted
- 1/2 Cup marshmallow fluff
Instructions
- To make this ice cream, start by whipping the heavy cream in a large mixing bowl until stiff peaks form. This step is key to creating the creamy texture of no-churn ice cream.2 Cups (473.2 ml) heavy whipping cream
- Once the cream is whipped, gently fold in the sweetened condensed milk, vanilla extract, salt, and sifted cocoa powder. Mix everything until fully combined, ensuring no lumps remain.14 ounces (396.9 g) (1 can) sweetened condensed milk, 2 teaspoons vanilla extract, 1/2 teaspoon (0.5 teaspoon) salt, 1/3 Cup (28.7 g) Cocoa powder + 1 Tablespoon
- If the marshmallow fluff feels too sticky or stiff, warm it in the microwave on low heat for a few seconds to soften it. This makes it easier to swirl later.1/2 Cup (63.5 g) marshmallow fluff
- Pour half of the chocolate mixture into a freezer-safe container, loaf pan, or airtight container. Add half of the softened marshmallow fluff in dollops throughout the layer, then use a knife to swirl it gently.Cover the first layer with the remaining chocolate mixture, ensuring it fully covers the bottom layer. Repeat the process with the remaining marshmallow fluff, swirling it into the top layer.
- Once everything is layered and swirled, cover the container tightly and freeze for at least 8 hours or overnight. When ready to serve, scoop and enjoy as is, or add a drizzle of chocolate syrup or melted chocolate on top of the ice cream for an extra indulgent touch!
Notes
Add-Ons and Substitutions for this homemade ice cream recipe
Add-Ons
- Chocolate Chips or chopped chocolate: Fold in mini or regular chocolate chips for extra texture and a boost of chocolate flavor.
- Crushed Cookies: Add crushed chocolate sandwich cookies, graham crackers, or wafer cookies for a crunchy mix-in.
- Chopped Nuts: Stir in chopped almonds, pecans, or hazelnuts for a nutty twist, or a rocky road ice cream flavor.
- Caramel or Fudge Swirl: Drizzle caramel or fudge sauce between the layers to create additional swirls.
- Sprinkles: For a fun, festive look, mix in colorful sprinkles.
- Marshmallows: Toss in mini marshmallows for even more marshmallow goodness.
- Peanut Butter Swirl: Add dollops of peanut butter and swirl it into the layers for a creamy, nutty flavor.
Substitutions
- Sweet Marshmallow Fluff: Substitute with marshmallow creme, or melt regular marshmallows with a little butter.
- Sweetened Condensed Milk: Use condensed coconut milk as a dairy-free alternative.
- Heavy Whipping Cream: Replace with coconut cream for a non-dairy version. Make sure to chill the can of coconut cream overnight and scoop out only the solid part.
- Vanilla Extract: Use an equal amount of almond extract or hazelnut extract for a unique flavor twist.
- Salt: Swap table salt with flaky sea salt for a subtle, gourmet touch.
Tips and Tricks
- Check your ingredients: Make sure you have everything ready before starting. Running out of ingredients mid-recipe can be frustrating!
- Boost the chocolate flavor: For a richer chocolate taste, use Dutch-processed cocoa powder instead of regular cocoa powder.
- Avoid lumps: Cocoa powder can be lumpy, so sifting it ensures a smoother ice cream mixture.
- Prevent freezer burn: Air exposure can cause freezer burn. Cover your container tightly with a lid, or use plastic wrap or aluminum foil if you’re using a loaf pan.
- Customize the texture: For softer ice cream, whip the heavy cream to soft peaks. For firmer ice cream, whip it to stiff peaks.
- Soften the marshmallow fluff: If the marshmallow fluff is too stiff, microwave it for a few seconds on low heat to make swirling easier.