Easy 3-ingredient flourless Chocolate Cake Recipe
This Easy 3-ingredient flourless Chocolate Cake Recipe is the easiest way to make a rich chocolate cake at home. You only need 3 simple ingredients and a mixer. No flour!
It’s a 3-ingredient chocolate cake that feels special but uses basic ingredients. The steps are simple and clear. If you can whisk eggs, you can make this.
This ingredient chocolate cake recipe is a great sweet treat for busy days. It’s quick to prep and gives you a rich chocolate cake with very little work.
Ingredients
This recipe calls for simple ingredients you can find at any grocery store. Each ingredient cake component has a clear job and keeps the texture smooth and rich.
- 50%-60% chocolate: This is the main flavor in this chocolate cake recipe. It creates the rich chocolate cake taste and structure.
- Unsalted butter: Helps the chocolate melt smoothly and gives the cake a soft, rich finish.
- Eggs: Eggs hold this 3-ingredient chocolate cake together and give it lift without flour.
Add-ons & Substitutions
Even though this is a 3-ingredient chocolate cake, you can still make small changes with simple ingredients. Keep the base the same for best results.
- Add a splash of vanilla extract for extra flavor
- Add a pinch of salt to balance the chocolate
- Top with whipped cream before serving
- Dust with cocoa powder or powdered sugar
- Serve with fresh berries for a fresh, sweet treat
- Serve with vanilla ice cream for extra indulgence
Take a look at the recipe card at the bottom of this post for the full recipe.

How to Make
Start by heating your oven to 325°F / 165°C. Line the bottom of an 8-inch round pan with parchment paper. Lightly grease the sides and dust with cocoa powder. Set it aside. Bring a kettle of water to a boil.
Place the chopped chocolate and butter in a heatproof bowl. Melt them slowly in the microwave (in a microwave-safe bowl) in short bursts of 20 seconds, or using a double boiler. Stir each time until smooth and completely melted. Let it cool until just warm, not hot to the touch.


Crack the eggs into a large mixing bowl. Whisk until they look pale and foamy. They should look airy but still pour easily. These air bubbles are what help the cake rise, so avoid over-whipping.
Scoop 1/4 of the eggs into the melted chocolate mixture, and stir gently until smooth. This helps the mixtures blend without clumping.
Pour the chocolate mixture into the rest of the eggs. Use a spatula and gently fold everything together.
Scrape the bottom and sides of the bowl so it mixes evenly. Fold rather than stir to keep the small air bubbles intact, which helps the cake bake up taller.
Pour the cake batter into your prepared pan and tap lightly on the counter once or twice to remove large bubbles. Smooth the top of the cake with a spatula.


Place the cake pan inside a larger pan, and carefully pour the hot water into the larger pan until it reaches halfway up the cake pan. This is the easiest way to help the cake bake evenly.
Transfer to the oven and bake for 40-50 minutes without opening the oven door. The edges should look set, and the center should jiggle slightly. The top should look matte, not wet, and a toothpick inserted in the middle of the cake should come out with a few moist crumbs, not wet batter.
Turn off the oven and crack the door open slightly. You can place a wooden spoon to keep it slightly open.
Let the cake cool in the oven for 15 minutes, then remove the pan from the water bath and place it on a cooling rack to cool completely. Cover and refrigerate for at least 2 hours.
Run a thin knife around the edge of the cake, release it from the pan, and serve chilled or at cool room temperature.
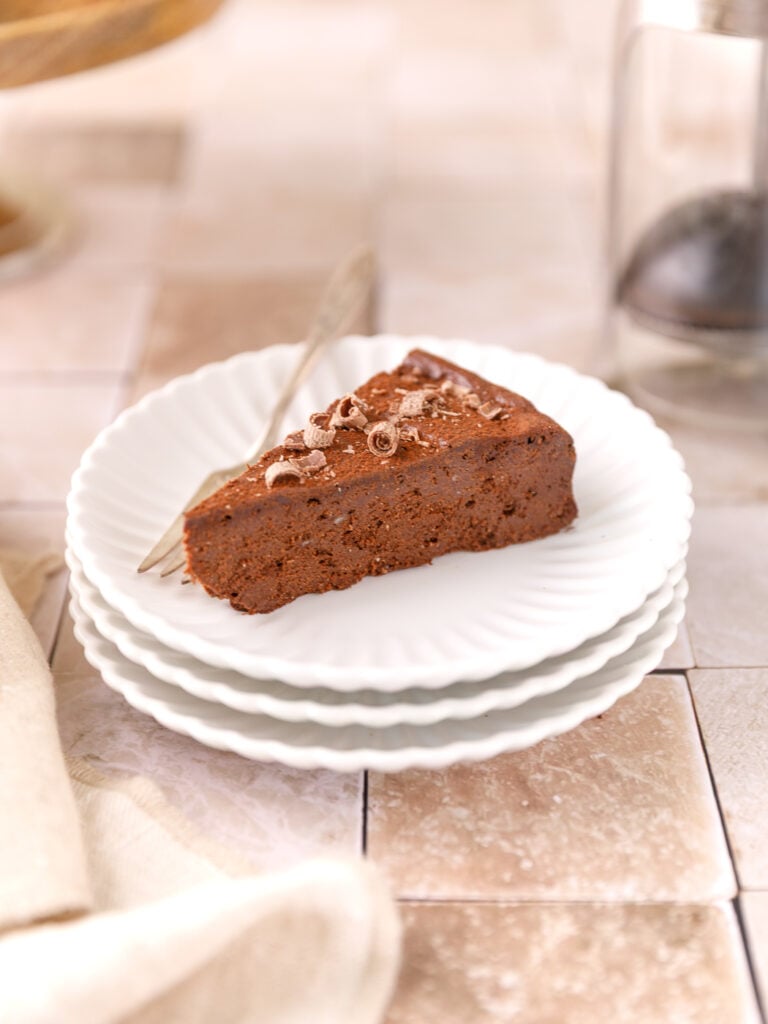
Optional: Shave chocolate on top or use chocolate chips for decoration.
Expert Tips
These tips make a big difference in this ingredient chocolate cake recipe and help you get a smooth, rich chocolate cake every time.
- Chocolate choice matters more here than in most cakes. Use good-quality chocolate in the 50–60% range for balance and better flavor
- Room temperature ingredients blend more smoothly and keep the batter from turning grainy
- Whisking the eggs correctly is the easiest way to give this ingredient cake lift without flour. Do not over-whip!
- Fold the egg gently with a spatula rather than stirring, so the batter stays light and stable
- Light tapping before baking removes large air pockets that can cause uneven baking
- The water bath keeps the heat gentle and steady for a smooth top, so don’t skip it!
- Slow cooling helps the cake hold its shape without cracking, so do it gradually.
- Chill before serving so the texture sets properly
- Serve with a scoop of vanilla ice cream for extra indulgence!

Frequently Asked Questions
Why did my cake sink in the middle?
Flourless cakes naturally settle slightly, but excessive sinking is usually caused by over-whipping the eggs, stirring instead of folding, skipping the water bath, or removing the cake from the oven too quickly. Cooling slowly helps prevent this.
Can I use darker chocolate, like 70% or higher?
You can, but the cake will be much less sweet and more intense since there is no added sugar. For best results and broad appeal, chocolate in the 50–60% range is recommended.
Why is my cake dense or heavy?
This usually happens when the egg mixture is deflated during mixing. Make sure to fold gently, not stir, once the chocolate is added, and avoid over-mixing.
Can I skip the water bath?
Technically, yes, but the cake is far more likely to crack, bake unevenly, or collapse. The water bath is one of the most important techniques for a smooth, professional-looking result.
How do I know when it’s done baking?
The edges should be set, the center should jiggle slightly when the pan is gently shaken, and the surface should look matte, not wet. A toothpick near the center should come out with moist crumbs, not liquid batter.
Does this cake need to be refrigerated?
Yes. Chilling allows the structure to fully set and gives the best texture. The cake slices cleanly and tastes richer once cooled.
Can I make this ahead of time?
Yes. This cake is ideal for making a day ahead. Store it covered in the refrigerator and bring it to cool room temperature before serving, if desired.
Why does this cake not taste like a regular cake?
This is a flourless chocolate cake, closer in texture to a baked chocolate truffle or dense brownie. The richness comes from technique and ingredients rather than flour or sugar.
How should I store this chocolate cake?
Store the cake covered in the refrigerator. Because it’s flourless and rich in chocolate and eggs, refrigeration helps the cake hold its structure and keeps the texture fudgy rather than soft or greasy.
Properly stored, it will keep well for up to 4 days. For the best flavor and texture, let the cake sit at room temperature for 15–20 minutes before serving.
Can I freeze this cake?
Yes, this cake freezes very well. Once fully cooled, wrap it tightly in plastic wrap, then wrap again in foil or place it in an airtight freezer-safe container. Freeze for up to 2 months.
Thaw overnight in the refrigerator, still wrapped, to prevent condensation from forming on the surface. This slow thaw preserves the smooth top and dense, creamy texture.
Follow this link if you’re looking for more 5 or less ingredients recipes like this one, or click the links below for easy chocolate recipes you might like:


Tag me on Instagram or Pinterest so I can see all your amazing creations! And if you make this Easy 3-ingredient flourless Chocolate Cake Recipe, please be sure to give it a star rating and leave a comment!

Easy 3-ingredient flourless Chocolate Cake Recipe
Equipment
- 1 Electric mixer
- 1 large mixing bowl
- 1 8-inch cake pan
Ingredients
- 14 ounces semisweet or dark chocolate (50–60% cocoa) chopped into equally-sized pieces
- 1/2 cup unsalted butter
- 6 largs eggs room temperature
Instructions
- Preheat the oven to 325°F / 165°C. Line the bottom of an 8-inch round pan with parchment paper. Brush the sides lightly with neutral oil, then dust with cocoa powder and tap out any excess. Set the pan aside. Bring a kettle of water to a boil.
- Place the chopped chocolate and butter in a heatproof bowl. Melt gently using a double boiler or microwave in 20–30 second intervals, stirring between each interval, until completely smooth. Set aside and let the mixture cool until warm but not hot to the touch.1/2 cup unsalted butter, 14 ounces semisweet or dark chocolate (50–60% cocoa)
- Crack the eggs into a large mixing bowl and whisk until pale, foamy, and slightly thickened. The eggs should look airy but still fluid. These small air bubbles are what help the cake rise, so avoid over-whipping.6 largs eggs
- Add about ¼ cup of the beaten eggs to the chocolate mixture and fold with a spatula until smooth. This will help temper the mixture.
- Pour the chocolate mixture into the remaining eggs and gently fold with a spatula, scraping the bottom and sides of the bowl, until just combined. Fold rather than stir to keep the small air bubbles intact, which helps the cake bake up taller and prevents it from becoming dense.
- Pour the batter into the prepared pan and tap the pan very lightly on the counter once or twice. This helps release any large air bubbles that could expand in the oven and cause the cake to deflate or bake unevenly, without disturbing the smaller bubbles that give the cake structure.
- Place the cake pan inside a larger roasting pan and carefully pour the boiling water into the roasting pan until it reaches halfway up the sides of the cake pan.
- Transfer to the oven and bake for 40–50 minutes without opening the oven door. The cake is done when the edges are set, the center jiggles slightly when gently shaken, and the surface looks smooth and matte. A toothpick inserted near the center should come out with moist crumbs, not liquid batter.
- Turn the oven off, crack the oven door open slightly using a wooden spoon to keep the door open, and let the cake sit inside for 15 minutes.
- Remove the pan from the oven and place it on a rack. Let the cake cool completely in the pan, then cover and refrigerate for at least 2 hours.
- Run a thin knife around the edge of the cake, release it from the pan, and serve chilled or at cool room temperature.Optional: Shave chocolate on top or use chocolate chips for decoration.
Notes
- Chocolate choice matters more here than in most cakes. Use good-quality chocolate in the 50–60% range for balance and better flavor
- Room temperature ingredients blend more smoothly and keep the batter from turning grainy
- Whisking the eggs correctly is the easiest way to give this ingredient cake lift without flour. Do not over-whip!
- Fold the egg gently with a spatula rather than stirring, so the batter stays light and stable
- Light tapping before baking removes large air pockets that can cause uneven baking
- The water bath keeps the heat gentle and steady for a smooth top, so don’t skip it!
- Slow cooling helps the cake hold its shape without cracking, so do it gradually.
- Chill before serving so the texture sets properly


